This post describes three ways you can reduce image sizes on a Mac OS X computer and one way on a Windows machine. All the methods can resize a batch of image files as easily as they can process a single file.
Resizing image files on a Mac OS X computer
The three methods are
1. Use iPhoto
2. Use Preview
3. Use an AppleScript
Resizing files with iPhoto
Import your image files into iPhoto using the File/Import to Library command. You will now have two copies of each image; one in its original location and one in an iPhoto database. The iPhoto copy will appear in a new ‘Event’ [or folder] in iPhoto.
Select the images you want to resize by holding down the CMD key and clicking on each in turn. Then select the File/Export command. Click on Kind and select jpeg. Set the image quality and size [you can also rename if you wish].
High quality and large size reduces a 1.5mb file to 468kb.
Medium quality and medium size reduces a 1.5mb file to 80kb. I use these settings for my blog images.
Low quality and small size reduces a 1.5mb file to 16kb
Maximum quality and small size reduces a 1.5mb file to 132kb.
Click Export and you will then be asked where you want iPhoto to put the reduced copies. Choose Desktop. You will now have three copies of each file. A 1.5mb copy in its original location, a 1.5mb copy in iPhoto and a reduced copy on your Desktop.
Resizing files with Preview
Copy your images to a new folder.
Use the File/Open command and select the files in the new folder. Click Open.
Select all the files and then use the Tools/Adjust Size command to resize the entire batch. You will need to experiment with the various settings to get the image size you want. I usually use a width of 7 inches and a resolution of 72.
You will now have two copies of each file. One full sized copy in its original folder and a reduced copy in the folder you created earlier.
Resizing files with an AppleScript
Open the AppleScript Script Editor and paste in the following script [credit].
-- save in Script Editor as Application
-- drag files to its icon in Finder

on open some_items
 repeat with this_item in some_items
   try
     rescale_and_save(this_item)
   end try
 end repeat
end open


to rescale_and_save(this_item)
 tell application "Image Events"
   launch
   set the target_width to 120
   -- open the image file
   set this_image to open this_item

   set typ to this_image's file type

   copy dimensions of this_image to {current_width, current_height}
   if current_width is greater than current_height then
     scale this_image to size target_width
   else
     -- figure out new height
     -- y2 = (y1 * x2) / x1
     set the new_height to (current_height * target_width) / current_width
     scale this_image to size new_height
   end if

   tell application "Finder" to set new_item to ¬
   (container of this_item as string) & "scaled." & (name of this_item)
   save this_image in new_item as typ

 end tell
end rescale_and_save
Enter ‘Reduce’ as the Save As name.
Choose the Desktop as where to save the script.
Choose Application as the file format.
Click on Save.
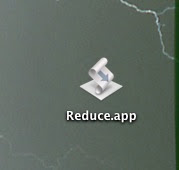
You will now have a ‘Reduce.app’ icon on your desktop [see the screen capture].

To use it drag and drop any file or files onto the Reduce.app icon. The script will process each file and put a reduced copy in the same folder as its original.
To get a larger or smaller reduction use Script Editor to change the ‘720’ in the script to some other number.
Resizing image files on a Windows computer
I use the IrfanView application. This free program is an excellent image viewer. It can also quickly and easily resize a batch of image files.
Download Irfanview from here.
Copy the files you want to resize to a new folder and then use the File/Batch Conversion Rename command. You can change file name, image quality and image size. Look at both the Options and Advanced Options menus. Irfanview offers far more options than any of the Mac methods but most of them can be ignored if all you want to do is shrink image files.
One final point. The iPhoto and AppleScript methods produce resized copies and do not change the original image. Irfanview and the Preview method both work by resizing the file they are given. For that reason you should only resize copies of your original files. You will want to keep the original images at their full size in case you need them for some other purpose.
2 comments:
Hi Roger. I use Flickr for images on my blog, and usually resize them to small setting before pasting the code.
Wanted to alert you to an article in today's NYTimes (available online) about privacy concerns of a European cell phone tracking study. Article author is 'john schwartz'
I know you are an expert on such matters....
Cheers,
Todd HellsKitchen
Thanks a lot, it works great!
Post a Comment